画像の表示
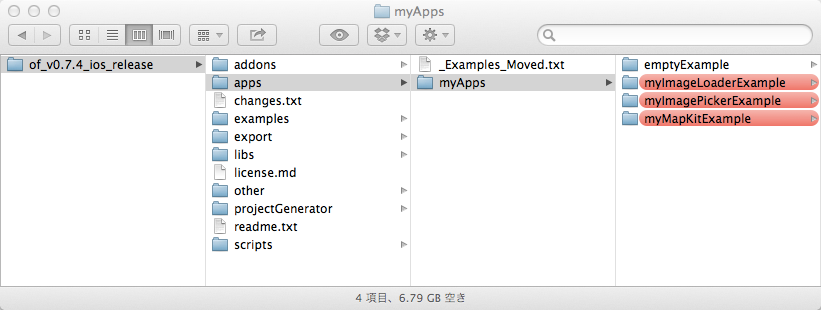
まずは、画像を表示するところから始めてみます。以下のファイルを使います。ファイルは、必ず以下のフォルダに入れて使ってください。
myImageLoaderStart150720
背景を表示してみる
まずは「testApp.mm」というファイルの「void testApp::setup()」というカッコの中に、以下の記述を加えてください。
wallpaper.loadImage("wallpaper/wallpaper1.png");
そして、xCodeの左上のRunボタンを押してください。このことによって、プログラムがiPadに転送されます。
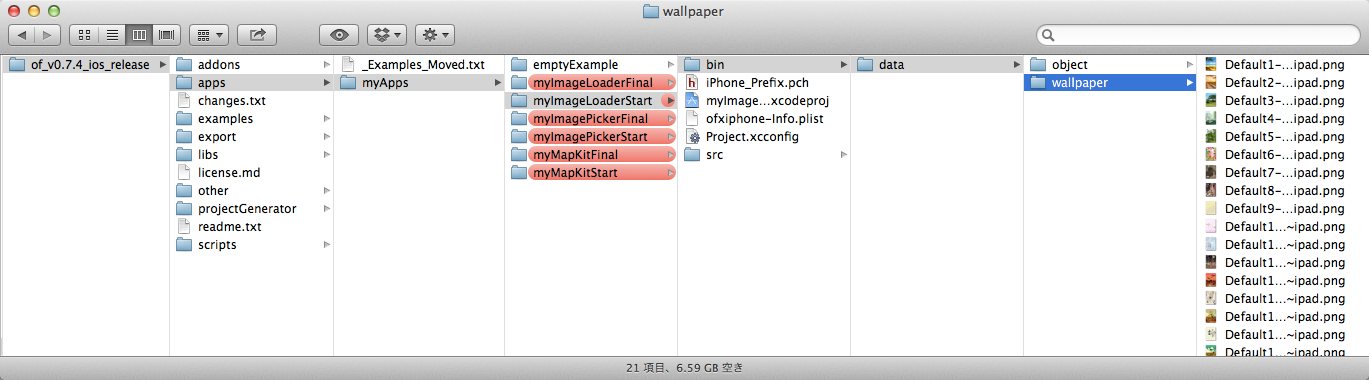
このコードは、以下のフォルダにある画像を読み込んでいます。他にもいくつか壁紙があるので、自分の好きな壁紙の名前に書き換えてみてください。
オブジェクトを表示してみる
同じ手順で、壁紙の手前にオブジェクトを表示してみます。
object.loadImage("object/object1.png");
これも同じように、すきなオブジェクトの名前に書き換えてください。
簡単なアニメーション
画像を移動してみる
次に、オブジェクトを動かしてみましょう。動かすためには、x座標とy座標という位置を表示するためのルールを知る必要があります。
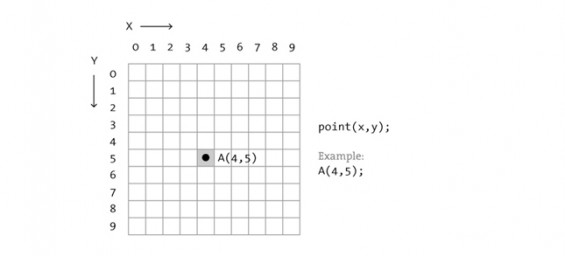
みなさんが今まで勉強して来た数学の座標と違い、コンピュータの場合は一般的に左上が起点になります。ですので、特にy軸方向が上から下に向かって数値が増えていくということを覚えておきましょう。
動かす前に、まずはアプリの起動時にオブジェクトの位置を変えてみます。
setup()の中のposX、posYの値を以下のように変えてみてください。
posX = 100;   //オブジェクトのx座標
posY = 100;   //オブジェクトのy座標
どうですか。オブジェクトの位置が変わったと思います。さらに、その下のxspeedの値を以下のように変更してみてください。
xspeed = 2; //x軸方向の速度
すると、オブジェクトが右に動き出します。同じようにyspeedの値も変えてみてください。
しかし、このままだとオブエジェクとは行ったきり戻ってきません。そこで、update()の中の以下のコードを有効にします。
    if(posX > ofGetWidth()) posX = 0;
    else if(posX < 0) posX = ofGetWidth();

    if(posY > ofGetHeight()) posY = 0;
    else if(posY < 0) posY = ofGetHeight();
このコードはもともと「/*」と「*/」に囲まれています。この状態だとコードが無効になっているので、これらの記号を削除してあげると、コードが有効になります。
すると、オブジェクトが端まで行くと最初の地点に戻って来ます。
画面をタッチして移動してみる
更に、画面をタッチする事によって、オブジェクトの位置を変えてみましょう。touchDown()の中に以下のコードを追加します。
void testApp::touchDown(ofTouchEventArgs & touch){

    posX = touch.x;
    posY = touch.y;
}
ランダムに動かしてみる
次は、タッチするごとにオブジェクトはランダムな方向に動くコードです。
void testApp::touchDown(ofTouchEventArgs & touch){

    posX = touch.x; //タッチした地点が、オブジェクトの位置になる
    posY = touch.y;

    xspeed = ofRandom(-5, 5);   //タッチするごとに-5から5までの間の数値を自動的に設定
    yspeed = ofRandom(-5, 5);
}
加速度センサー
画像を傾けて動かしてみる
加速度センサーは意外に簡単です。まずはsetup()を以下のように書き換えましょう。ofxAccelerometer.setup()が追加されます。更に、ひとまずxspeedは0にしておきましょう。
void testApp::setup(){

    ofxAccelerometer.setup();   //加速度センサーを使う

	wallpaper.loadImage("wallpaper/wallpaper1.png");
	object.loadImage("object/object1.png");

    posX = 100;   //オブジェクトのx座標
    posY = 100;   //オブジェクトのy座標

    xspeed = 0; //x軸方向の速度
    yspeed = 0; //y軸方向の速度

    reaction = 0.7; //反発力
}
さらに、update()に2行追加します。
void testApp::update(){

    xspeed += ofxAccelerometer.getForce().x;    //センサーの値を速度に加算
    yspeed -= ofxAccelerometer.getForce().y;

    posX += xspeed;
    posY += yspeed;

    //繰り返し
    /*
    if(posX > ofGetWidth()) posX = 0;
    else if(posX < 0) posX = ofGetWidth();

    if(posY > ofGetHeight()) posY = 0;
    else if(posY < 0) posY = ofGetHeight();
    */

    //折り返し
    if(posX > ofGetWidth() || posX < 0) xspeed = -xspeed;
    if(posY > ofGetHeight() || posY < 0) yspeed = -yspeed;

    //バウンス
    /*
    if(posX > ofGetWidth()){
        posX = ofGetWidth();
        xspeed *= -reaction;
    }else if(posX < 0){
        posX = 0;
        xspeed *= -reaction;
    }

    if(posY > ofGetHeight()){
        posY = ofGetHeight();
        yspeed *= -reaction;
    }else if(posY < 0){
        posY = 0;
        yspeed *= -reaction;
    }
    */
}
追加されたのは、3, 4行目です。そして、「繰り返し」のコードは停止し、「折り返し」のコードを有効にしています。この事によって、オブジェクトは端まで行くと止まるようになります。
画像をバウンドさせてみる
せっかくなので、オブジェクトをバウンドさせたいところです。update()を以下のように変更して下さい。
void testApp::update(){

    xspeed += ofxAccelerometer.getForce().x;    //センサーの値を速度に加算
    yspeed -= ofxAccelerometer.getForce().y;

    posX += xspeed;
    posY += yspeed;

    //繰り返し
    /*
    if(posX > ofGetWidth()) posX = 0;
    else if(posX < 0) posX = ofGetWidth();

    if(posY > ofGetHeight()) posY = 0;
    else if(posY < 0) posY = ofGetHeight();
    */

    //折り返し
    /*
    if(posX > ofGetWidth()) posX = ofGetWidth();
    else if(posX < 0) posX = 0;

    if(posY > ofGetHeight()) posY = ofGetHeight();
    else if(posY < 0) posY = 0;
    */

    //バウンド
    if(posX > ofGetWidth()) { posX = ofGetWidth(); xspeed *= -reaction; }
    else if(posX < 0)  { posX = 0; xspeed *= -reaction; }

    if(posY > ofGetHeight()) { posY = ofGetHeight(); yspeed *= -reaction; }
    else if(posY < 0)  { posY = 0; yspeed *= -reaction; }
}
更に、setup()の中のreactionの値を変えると反発力が変わります。反発したときに減速して行って欲しいので、1.0未満の値を入れます。
reaction = 0.7; //反発力
カメラ
撮影してみる
まず、「myImagePickerStart150720」をダウンロード・解凍し所定のフォルダに入れ、実行してみてください。
普通にカメラが起動して、写真を撮る事ができます。
エフェクトをかけてみる
もちろん、これだけだとつまらないので、少し色味を変えてみましょう。
次に、update()の中の、effect1の部分を以下のように書き換えてみます。
displayPixels[y*cameraW*4 + x*4] = g;   //赤
displayPixels[y*cameraW*4 + x*4 + 1] = b;   //緑
displayPixels[y*cameraW*4 + x*4 + 2] = r;   //青
displayPixels[y*cameraW*4 + x*4 + 3] = 255;
モニタの色は、red(赤)、green(緑)、blue(青)の順番で表示されているのですが、この順番を変えてみます。
本来赤の部分が緑に。本来緑の部分が青に。本来青の部分が赤に変換されます。かなり色が変化したのが分かるのではないかと思います。これを元にして色々組み合わせを変えてみましょう。
このエフェクトは、赤を強調します(緑と青を引き算する)。
g = g - 100;    //緑を引く
if(g < 0) g = 0;    //0未満にはならないように制限する

b = b - 100;    //青を引く
if(b < 0) b = 0;    //0未満にはならないように制限する

displayPixels[y*cameraW*4 + x*4] = r;   //赤から緑
displayPixels[y*cameraW*4 + x*4 + 1] = g;   //緑から青
displayPixels[y*cameraW*4 + x*4 + 2] = b;   //青から赤
displayPixels[y*cameraW*4 + x*4 + 3] = 255;
このエフェクトは、色をグレーにします。
displayPixels[y*cameraW*4 + x*4] = (r + g + b) / 3;   //赤
displayPixels[y*cameraW*4 + x*4 + 1] = (r + g + b) / 3;   //緑
displayPixels[y*cameraW*4 + x*4 + 2] = (r + g + b) / 3;   //青
displayPixels[y*cameraW*4 + x*4 + 3] = 255;
次のエフェクトは、完全に色を反転させます。
displayPixels[y*cameraW*4 + x*4] = 255 - r;     //赤
displayPixels[y*cameraW*4 + x*4 + 1] = 255 - g;     //緑
displayPixels[y*cameraW*4 + x*4 + 2] = 255 - b;     //青
displayPixels[y*cameraW*4 + x*4 + 3] = 255;
このエフェクトは白と黒の2階調に変更します。
int brightness = (r + g + b)/3;

if(brightness < 127)
{
    displayPixels[y*cameraW*4 + x*4] = 255;     //赤
    displayPixels[y*cameraW*4 + x*4 + 1] = 0;     //緑
    displayPixels[y*cameraW*4 + x*4 + 2] = 0;     //青
    displayPixels[y*cameraW*4 + x*4 + 3] = 255;

}else if(brightness >=127)
{
    displayPixels[y*cameraW*4 + x*4] = 255;     //赤
    displayPixels[y*cameraW*4 + x*4 + 1] = 255;     //緑
    displayPixels[y*cameraW*4 + x*4 + 2] = 255;     //青
    displayPixels[y*cameraW*4 + x*4 + 3] = 255;
}
その他にも、形を変形するサンプルなどもありますので、試してみてください。
カメラのプログラムをプリクラっぽくしてみる
それでは、このカメラの撮影画像にフレームなどを追加して、プリクラの画像っぽくしてみましょう。
10〜12行目のコードのコメントアウトを取ってください。
deco1.loadImage("deco/deco1.png");
object1.loadImage("object/object1.png");
frame1.loadImage("frame/frame1.png");
さらに、draw()の中のコメントアウトも取ってください(250〜252行目あたり)。
void ofApp::draw(){
    ofBackground(0, 0, 0);

    if(photo.isAllocated()){
        photo.draw(imgPos);
        object1.draw(400, 400, object1.getWidth()*1.0, object1.getHeight()*1.0);
        deco1.draw(0, 100, deco1.getWidth()*1.0, deco1.getHeight()*1.0);
        frame1.draw(0, 0);
    }else{
        camImg.draw(camRect);
        libImg.draw(libRect);
    }
}
この状態でプログラムを実行すると、事前に用意されたフレーム、デコレーション、オブジェクトが表示されます。いろんなパーツを組み合わせて好みのフレームを作ってください。
ここでポイントがあります。
上記の7行目のコードでは、deco1のx, y座標と大きさも決めています。
例えば大きさを2分の1にしたければ以下のようになります。
deco1.draw(0, 100, deco1.getWidth()*0.5, deco1.getHeight()*0.5);
パーツは画像なので、大きくすると画質が下がるので気をつけましょう。一般的には縮小したほうが見た目は綺麗になります。
地図
まずは地図を表示してみる
まずは「myMapKitStart」をダウンロード・解凍、所定のフォルダに入れ、実行してみてください。
問題なければ地図が表示されるはずです。
地図の表示方法を変えてみる(通常、衛星画像、混合)
setup()の中で、はじめは地図のみを表示するモードに設定しているので、以下の衛星写真や地図と衛星写真の混合も試してみて下さい。
mapKit.setType(OFXIPHONE_MAPKIT_MAP);
mapKit.setType(OFXIPHONE_MAPKIT_SATELLITE);
mapKit.setType(OFXIPHONE_MAPKIT_HYRBID);
ボタンを押して現在地に移動してみる
setup()に2行追加します。
cLocation = new ofxiPhoneCoreLocation();
hasGPS = cLocation->startLocation();
次に、update()内を以下のように変更します。
void ofApp::update() {
	if(mapKit.isOpen()) {
//		printf("User is %son screen\n", mapKit.isUserOnScreen() ? "" : "not ");

        if(locFlag1 == TRUE)
        {
            mapKit.setCenter(cLocation->getLatitude(),cLocation->getLongitude(),true);
            locFlag1 = FALSE;
        }
	}
}
完全なコード(setup()とupdate())は以下の通りです。
//--------------------------------------------------------------
void ofApp::setup(){

    ofBackground(0, 0);

    cLocation = new ofxiPhoneCoreLocation();
    hasGPS = cLocation->startLocation();

	// initialize the accelerometer
	ofxAccelerometer.setup();

	// dump lots of info to console (useful for debugging)
	ofSetLogLevel(OF_LOG_VERBOSE);

	ofEnableAlphaBlending();

	// load font for displaying info
	font.loadFont("verdana.ttf", 12);

	// open the mapview
	mapKit.open();

	// set initial position to specified coordinates, and cover 1000 Km x 1000 Km area
	mapKit.setRegionWithMeters(POS2_LATITUDE, POS2_LONGITUDE, 1000, 1000);

	// optionally add ofApp as a listener for map event (callbacks below)
	mapKit.addListener(this);

	// set other optional parameters
	mapKit.setShowUserLocation(true);
	mapKit.setType(ofxiOS_MAPKIT_HYRBID);
//	mapKit.setAllowZoom(false);
//	mapKit.setAllowScroll(false);
//	mapKit.setAllowUserInteraction(false);

	// do some hardcode OPTIONAL stuff to render the opengl view ONTOP of the map view
	// note this could affect performance quite seriously

	// add OpenGL View main window.
    ofxiOSSendGLViewToFront();

	// OpenGL View is now in front of mapview, but it isn't transparent, so we can't see the map
	// Make the map transparent so we can see the mapview in undrawn areas
	ofxiOSSetGLViewTransparent(true);

	// Now that the OpenGL view is in front of the mapview, it will receive all the touch events, so we cannot interact with the map
	// So disable interaction with the OpenGL view (ofApp::touchXXXXX will not be called)
	ofxiOSSetGLViewUserInteraction(false);

    myGuiViewController = [[MyGuiView alloc] initWithNibName:@"MyGuiView" bundle:nil];
	[ofxiPhoneGetGLParentView() addSubview:myGuiViewController.view];

    locFlag1 = locFlag2 = locFlag3 = FALSE;
}


//--------------------------------------------------------------
void ofApp::update() {
	if(mapKit.isOpen()) {
//		printf("User is %son screen\n", mapKit.isUserOnScreen() ? "" : "not ");

        if(locFlag1 == TRUE)
        {
            mapKit.setCenter(cLocation->getLatitude(),cLocation->getLongitude(),true);
            locFlag1 = FALSE;
        }
	}
}
自分が行きたい場所に移動してみる
update()の部分を以下のように変更するだけです。このサンプルではヴェルサイユ宮殿の緯度経度を指定しています。
void testApp::update() {
	if(mapKit.isOpen()) {
//		printf("User is %son screen\n", mapKit.isUserOnScreen() ? "" : "not ");

        if(locFlag1 == TRUE)
        {
            //mapKit.setCenter(cLocation->getLatitude(),cLocation->getLongitude(),true);
            mapKit.setCenter(35.685605,139.752275,true);
            locFlag1 = FALSE;
        }
	}
}
このプログラムは、位置情報を3つまで登録出来るようになっています。
locFlag1, 2, 3と増やしてみましょう。

void ofApp::update() {
	if(mapKit.isOpen()) {
//		printf("User is %son screen\n", mapKit.isUserOnScreen() ? "" : "not ");

        if(locFlag1 == TRUE)
        {
            mapKit.setCenter(cLocation->getLatitude(),cLocation->getLongitude(),true);
            locFlag1 = FALSE;
        }

        if(locFlag2 == TRUE)
        {
            mapKit.setCenter(41.890242, 12.492226,true);
            locFlag2 = FALSE;
        }

        if(locFlag3 == TRUE)
        {
            mapKit.setCenter(40.7197,-74.0019,true);
            locFlag3 = FALSE;
        }
	}
}